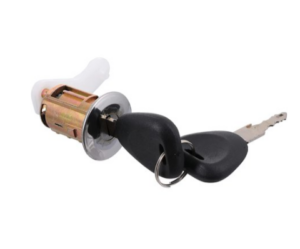
RV door lock cylinder replacement. As an avid RV enthusiast, you know the importance of maintaining the security of your beloved home on wheels. One of the essential components of your RV security system is the door lock cylinder. Over time, these lock cylinders can wear out, become damaged, or fail altogether, leaving your RV vulnerable to theft or break-ins. If you find yourself in this situation, don’t worry; replacing your RV door lock cylinder is a straightforward process that you can handle with a few simple tools and some basic know-how.
In this article, we’ll guide you through the steps to replace your RV door lock cylinder quickly and easily. But before we get started, let’s talk about why it’s important to replace a faulty lock cylinder.

Why You Need to Your RV Door Lock Cylinder Replacement
A faulty door lock cylinder can pose a serious security risk to your RV. If the lock is not functioning correctly, it can be easily bypassed by thieves or intruders, allowing them access to your RV and your valuable belongings. Even if your lock is still functioning, it’s a good idea to replace it if you notice signs of wear or damage. A damaged lock cylinder can make it difficult to open and close your RV door, which can be frustrating and even dangerous in an emergency.
Steps to Replace Your RV Door Lock Cylinder
Replacing your RV door lock cylinder is a simple process that you can handle with a few basic tools. Here are the steps you need to follow:
Step 1: Remove the Old Lock Cylinder
The first step is to remove the old lock cylinder from your RV door. To do this, you’ll need to locate the retaining screw on the lock cylinder’s interior side and remove it with a screwdriver. Once the screw is removed, you can slide the cylinder out of the door.
Step 2: Measure the Old Lock Cylinder
Before you can install the new lock cylinder, you need to measure the old one to ensure you get the right replacement. Use a ruler or tape measure to determine the length of the cylinder and the diameter of the hole it fits into.
Step 3: Purchase a New Lock Cylinder
With the measurements in hand, head to your local RV supply store or browse online to find a replacement lock cylinder that matches your old one.
Step 4: Install the New Lock Cylinder
Once you have your new lock cylinder, it’s time to install it. Simply slide the new cylinder into the hole in the door and secure it in place with the retaining screw.
Step 5: Test the New Lock Cylinder
Finally, test your new lock cylinder to make sure it’s functioning correctly. Turn the key in the lock to lock and unlock the door, and make sure the door opens and closes smoothly.
If your lock cylinder is not working correctly, it’s critical to replace it as soon as possible. The longer you wait, the greater the risk of someone gaining access to your RV without your permission. This can lead to the loss of valuable belongings and can even put your personal safety at risk. rv door lock cylinder replacement.
Even if your lock cylinder is still functional, it’s a good idea to replace it if you notice any signs of wear or damage. Over time, the lock cylinder can become worn or corroded, making it difficult to turn the key or causing the lock to stick. A damaged lock cylinder can also make it challenging to open and close your RV door, which can be frustrating and even dangerous in an emergency.
By replacing your RV door lock cylinder when necessary, you can ensure the safety and security of your vehicle and your belongings. It’s a simple and affordable way to safeguard your investment and enjoy the open road with peace of mind.
Replacing your RV door lock cylinder is a simple and affordable way to ensure your RV’s security and your peace of mind. By following these steps, you can replace your faulty lock cylinder in no time and get back to enjoying the open road with confidence. Remember to measure your old lock cylinder carefully and purchase a replacement that matches its specifications, and don’t hesitate to seek professional help if you encounter any difficulties during the process.
